File integrity and security is an often overlooked concern. However, increased file sizes and the importance has led to a rapid upturn in storage needs. This has been filled primarily by cloud storage solutions like Google Drive and OneDrive, but that just puts you data on somebody else’s computer. Instead of entrusting your data to other people, why not run your own Network Attached Storage (NAS)? You can even setup Usenet on your NAS directly with very little effort.
What is an NAS?
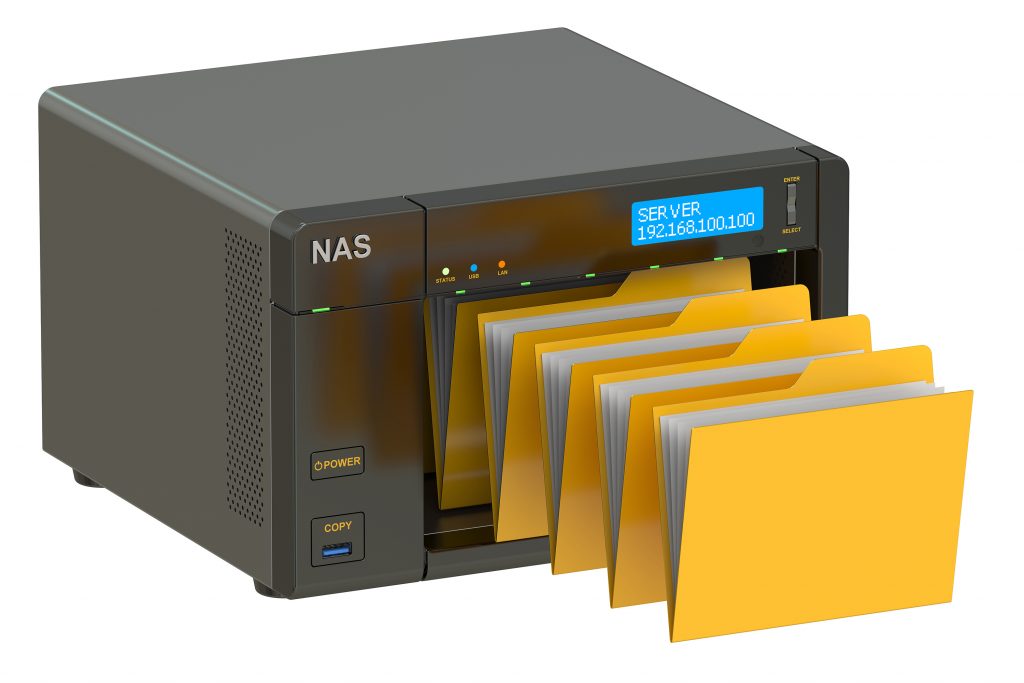
An NAS is a computer designed to hold hard drives and connect to your local network. It’s usually in the shape of a box with banks for hard drives and a few ports on the back. Most are accessed by opening a web browser on your main computer and going to a specific address.
The best thing about having your own NAS is that you are in complete control of it. You can choose how much storage you want, who has access, what services are offered, and more. Moreover, it’s connected to your local network, so uploads are much, much faster.
If you frequently download Usenet files, you might even want to setup Usenet on your NAS.
How to Setup Usenet on Your NAS
For this examine, we’re using a Synology 1520 NAS with three 16GB hard drives installed in it because that’s what we have. If you’re using a QNAP, ASUSTOR, or similar, the process remains the same.
- Log into your NAS and open your package manager. In the DSM OS, it’s called “Package Center.” You want to search for a program called “Docker,” which lets you run programs that aren’t necessarily made for your OS without installing a new one.
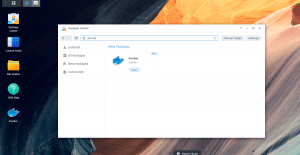
- Open Docker and click on “Registry” on the left side menu. Search for “sabnzbd” or the newsreader of your choice and select one of the containers. For this, we’re going to go with the one from linuxserver.
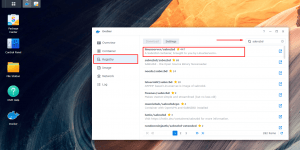
- The next step to setup Usenet on your NAS is configuring your newsreader. Select “Image” in the left side menu and click on the container you just downloaded. Click the “Launch” button at the top of the window and you should see another window that looks like this:
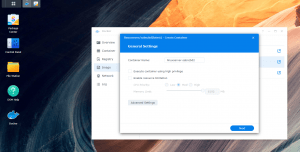
- For the next few steps, you’ll have to configure your container. There are a lot of choices. We’re going to show you our preferred setup, but encourage you to look up what every option does. Start by clicking “Advanced Settings” and check “Enable auto-restart.” That way if there’s a problem and the container crashes, it’ll try to restart itself. DO NOT CLICK APPLY YET.
- Click the “Volume” tab. Here we will have to “mount” (i.e. tell the computer how to access) relevant folders. Start by clicking “Add Folder” and then “Create Folder”. Name this folder “Configurations”. Once you have created it, click “Select” and it’ll bring you back to the Volume tab. DO NOT CLICK APPLY YET.
- In the row that’s just appeared with your folder, under “Mouth path,” type /Configurations. That tells Docker to put all the configuration files in there. Repeat steps 5 & 6, but for a folder called “Downloads”. Remember, all of these are case sensitive. DO NOT CLICK APPLY YET.
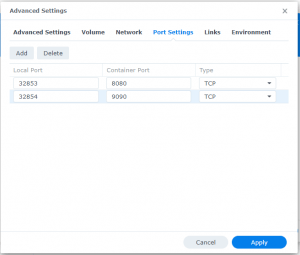
- Next, click the Port Settings tab. There should be two fields that read “Auto.” Change those to 32853 and 32854. DO NOT CLICK APPLY YET.
- To setup Usenet on your NAS, we need just a little more information from your computer. Click on the Environment tab at the top of the window. We’re going to add a couple of new variables here, but we also need some additional information. For now, click Add and create a variable called “PGID” (without the quotes), and then click Add again and create another called “PUID” (also without the quotes).
- In your NAS, open your Control Panel and click “Terminal & SNMP.” Make sure that “Enable SSH service” is checked, the click “Apply”.
- If you are using MacOS or Linux, open a terminal. If you are using Windows, open the Command Prompt by typing “cmd” in the search box next to your Start button. Type the following command:
ssh admin@[serveripaddress]
In this case “admin” is the username and [serveripaddress] is where the NAS is located on your network. You can find this by looking at the URL bar of your browser.
- If it asks you if you’re sure you want to continue connecting, type yes, then enter your password at the prompt. When you’ve logged in, you’ll be given another prompt. Type “id” and take a look at the output. The two numbers you want are the one after “uid=” and the one after “groups=” that’s followed by “(administrators)”.
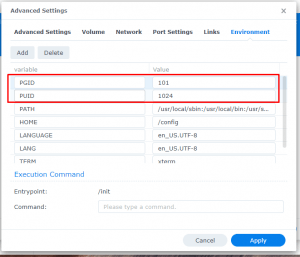
- Put the uid number in the Value field next to PUID and put the group number in the field next to PGID. Now you can click Apply.
- You’ll be brought way back to the General Settings menu where you can finish setting up Usenet on your NAS. Click Next, and then Done. Your container should automatically be running, but in case you want to check, you can always go to the Container menu in the left side menu to check.
- Almost done. Open a new browser tab and type in the server ip address that you got earlier. Remember: it’s in the address bar of the tab you used to access to NAS. Follow it with a colon and the number 32853, so it should look like this: https://192.168.50.67:32853/
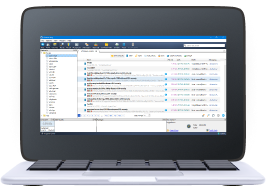
- Congratulations! You’re running a Usenet newsreader on your NAS. Set up SABnzbd the same way you would on your regular computer. You’ll be able to add NZB files and have them download directly to the Downloads folder now.
Setting Up Your Other Applications
As part of setting up Usenet on your NAS, you’ll want to get all of your common Usenet apps running in Docker. Just follow the exact same instructions, except pick a different number in Step 7. I like to increment each one up by one, so the next port would be 32855, then 32856, etc. Makes things easier to keep track of.
That seems like a complicated process, but after an app or two it becomes much easier. Take your time, Google when you’re curious, and don’t be afraid to try different things. Pretty soon, you’ll have the ultimate Usenet setup on your NAS.